
BEFORE
The title of this blog should really be 'I made funny faces all night to do a product review for you.' The product I am reviewing this time is Dial A Smile's Whitening Lightening Kit and it's kind of an ongoing solution for teeth whitening, so I'll be sharing the results of it as I continue the process. My dental history is alright. I have decently straight teeth and always have. I did have braces in my late teens / early 20s to correct an alignment issue that would eventually cause an underbite in the future. I also have a cap on my front right tooth (left in pictures, as you can see) and a few chips here and there.
I have been wanting to whiten my teeth since I got my braces off two years ago and finally had a way to obtain this kit. This kit is not cheap and originally runs for $400. Thanks to Kandee Johnson (major beauty guru on YouTube) offered a tutorial on how to do this and coupon code 'SPECIALKIT' to others looking to invest in it. With the code my price became $70 and it was a deal.

It arrived today and I was thrilled! I have been brushing, flossing and picking all week to prepare (probably overdid it a few times, but I am determined!). I opened it and it contains the following:

One circular card to show your starting point and your ending point once the treatment is complete, 3 mint finger scrubbers (not sure what to call these- you slip them on your fingers and polish your teeth before application), 3 vials of vitamin e to protect your gums, the syringe of gel, and a blue light.

Believe it or not my teeth are an 11, even though they show as being much whiter in these photographs. You can kind of tell what my level really is once I get to the gel application picture.
The first real step is to floss (as Kandee recommends). This is a good first step to take as you do not want to whiten the food particles between your teeth. I also dry brushed mine (just wet my tooth brush a little bit and brushed over them. NO toothpaste.) for good measure.

The next step is to get out one of the finger wipes and wipe the remainder sludge from your teeth. You want to essentially clean them up a bit and dry the surface.

Immediately following this step, break open the q-tip vial of vitamin e and generously coat your gums! I cannot stress this enough right now. I missed the smallest spot around one of my teeth and when I was done and cleaned up my tooth was burning. It's still a little raw now a few hours later.
Once your teeth are all clean, your lips are sticking to them and your saliva doesn't quite know where to go, you transfer some of the gel into the cup from the syringe. Now, this said that this is good for 3 applications but it appears that I'm going to have far more gel when the time comes. I'm not sure if maybe I didn't apply enough of if I should have caked the goop on, but with the burning around that one tooth, I'm skeptical that there is any way that I did it wrong.

Here's how you apply the gel (it's like painting your nails [and all the little crevices too!])
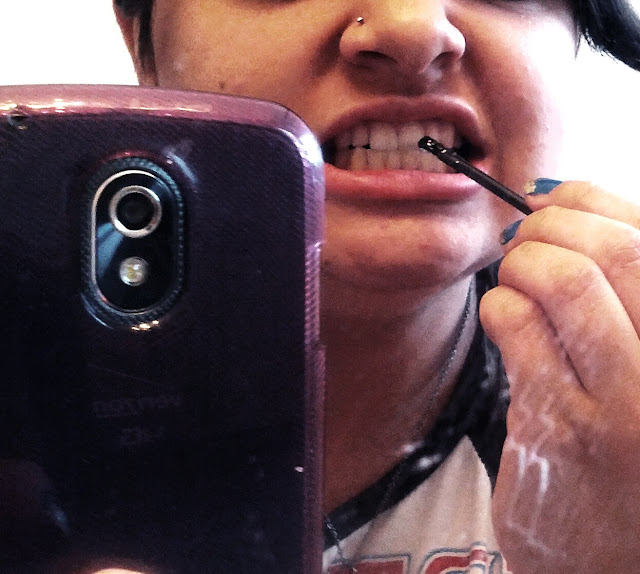
Here's where you can see some true color to my teeth and the application of the gel on my teeth.

Last is the ever powerful blue light. Once the gel is applied you bite on/around this baby for 20 minutes. Since I was already on YouTube reviewing Kandee's video to make sure I wouldn't mess up and to listen to her tips, I just watched a few more of her video's and some Tyler Oakley.

(so attractive!)

AFTER
Finally I turned off the light device, spit out what I could and brushed and rinsed out my mouth. I don't really know if it made a massive impact but I am going to use my circle chart and compare again in the morning. I shall keep you updated on the whitening process as well!
No comments :
Post a Comment